
CodeTokens.praat
Many linguistic variables that are important to language variation and change research require a tedious and time-consuming step in the data preparation workflow: auditory coding, listening to individual tokens of a variable and determining which variant each token represents. One way to do auditory coding in APLS would be to open each search result on the Transcript page and use the word menu to play just the utterance that contains the token. But we’ve created a better way: CodeTokens.praat.
CodeTokens.praat is a program that runs within Praat, a free program for phonetic analysis. It makes auditory coding much easier and faster by seamlessly integrating with the APLS Search results page, playing tokens one-at-a-time, providing a graphical user interface for selecting variants, and writing your codes to a CSV file that can then be imported into a program like Microsoft Excel or R for statistical modeling and/or data visualization.
On this page
Prerequisites
You only need to complete these steps once per computer.
- Download Praat from https://praat.org/ and install it on your computer.
- If you already have Praat, make sure it’s at least version 6.4.32. You can check your Praat version in the Praat Objects window by selecting Help > About Praat.
- Download
CodeTokens.praatby clicking this link: https://github.com/djvill/code-tokens-dot-praat/releases/latest/download/CodeTokens.praat- When you open
CodeTokens.praat, your computer will probably open it in Praat automatically. If not, open Praat and select Praat > Open Praat script…
- When you open
Preparing files for coding
We’ll use a simple example for demonstration purposes: the pronounciation of the with a full [i] vowel vs. a reduced [ə] vowel. To make this a manageable dataset, we’ll only look at tokens from a single short transcript, CB01pairs.eaf.
- Search for tokens on the Search page.
- On the Search results page:
- Open the options panel for CSV Export
- Set
Include annotation start/end times:to (always) if manually, automatically, or default aligned
- Click CSV Export
- Click Utterance Export
- This will download a
.zipfolder with Praat TextGrids, one for each utterance that contains a search result
- This will download a
- Click Audio Export
- This will download a
.zipfolder with audio files, one for each utterance that contains a search result
- This will download a
- Unzip the two
.zipfolders you just downloaded - Back on the Search results page, copy the search name from the title at the top of the page.
By default,
CodeTokens.praatlooks for these files in your Downloads folder. If you download them to a different folder, change theInput foldersetting on the basic settings window
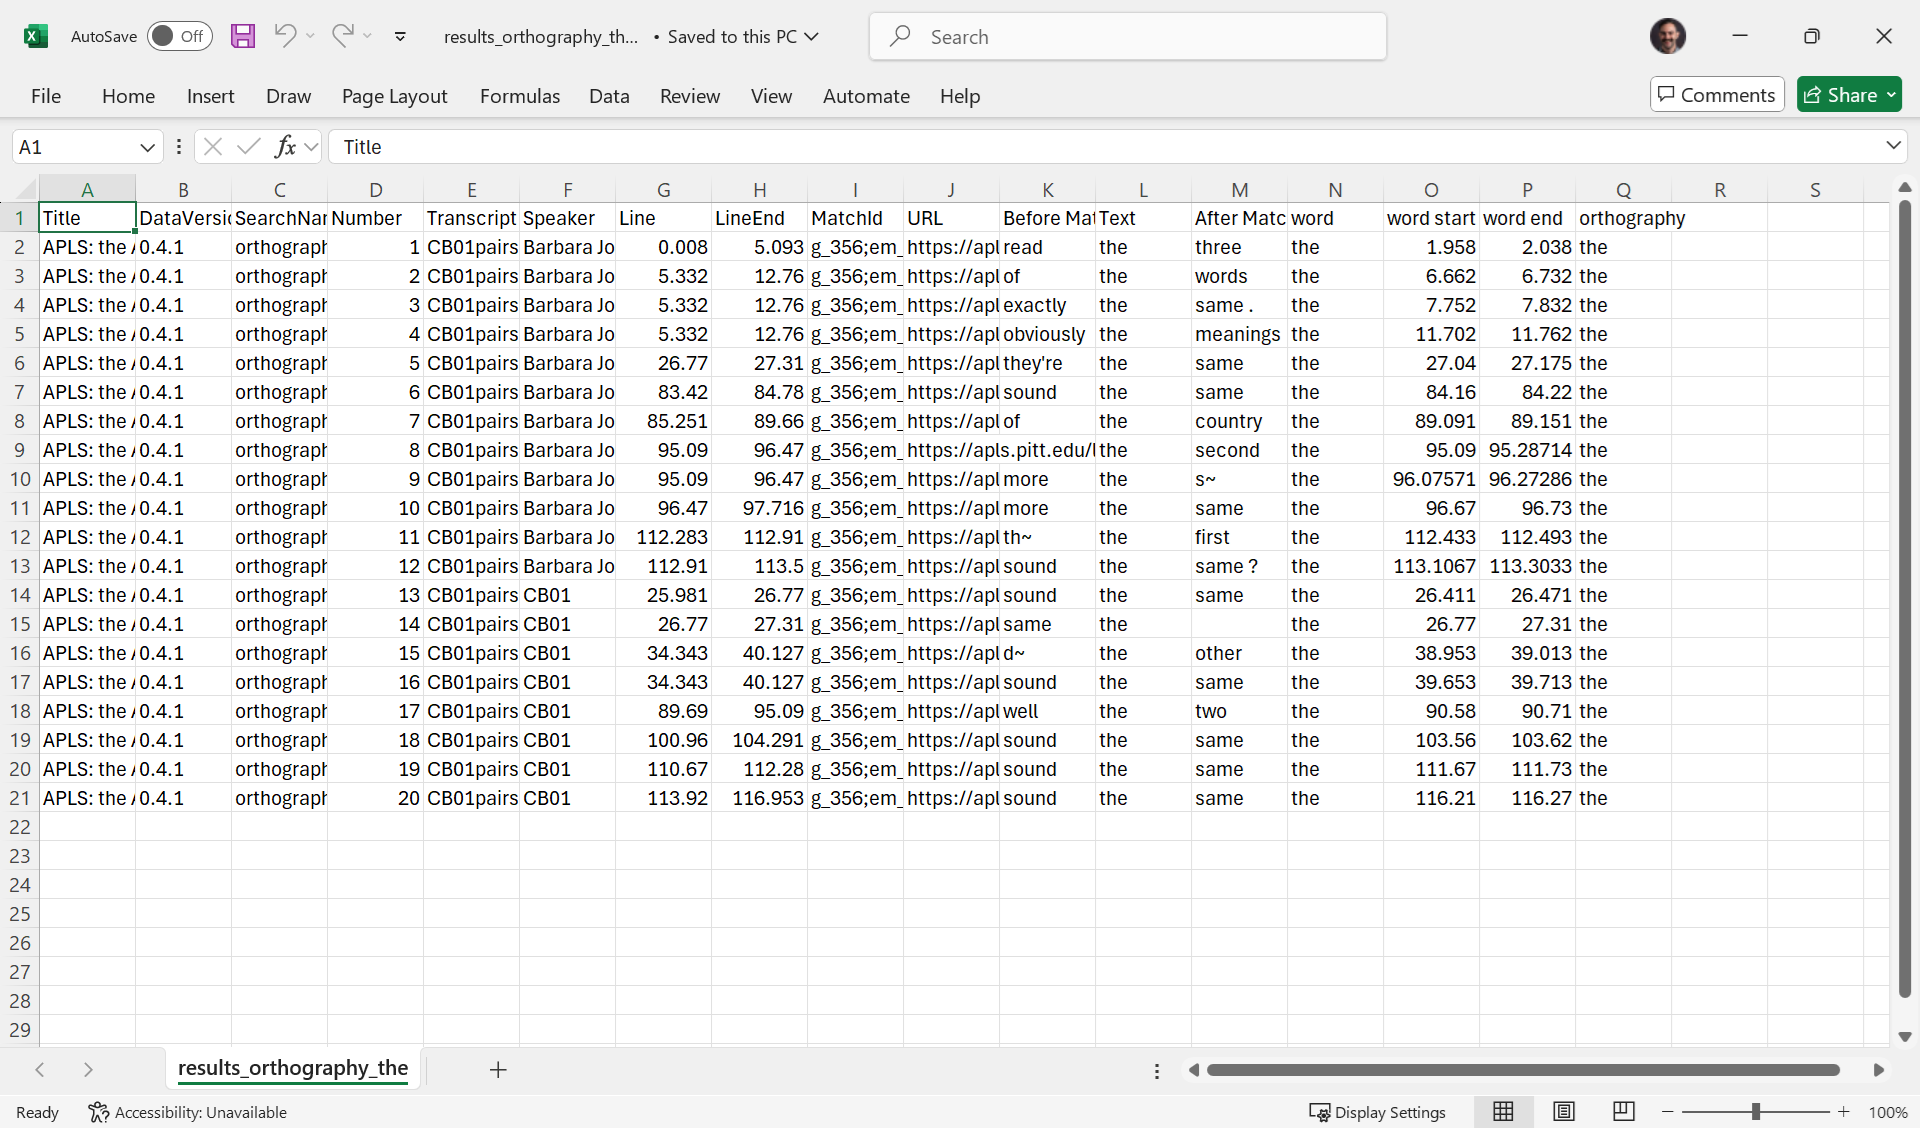
For the example search, here’s what the exported CSV looks like:
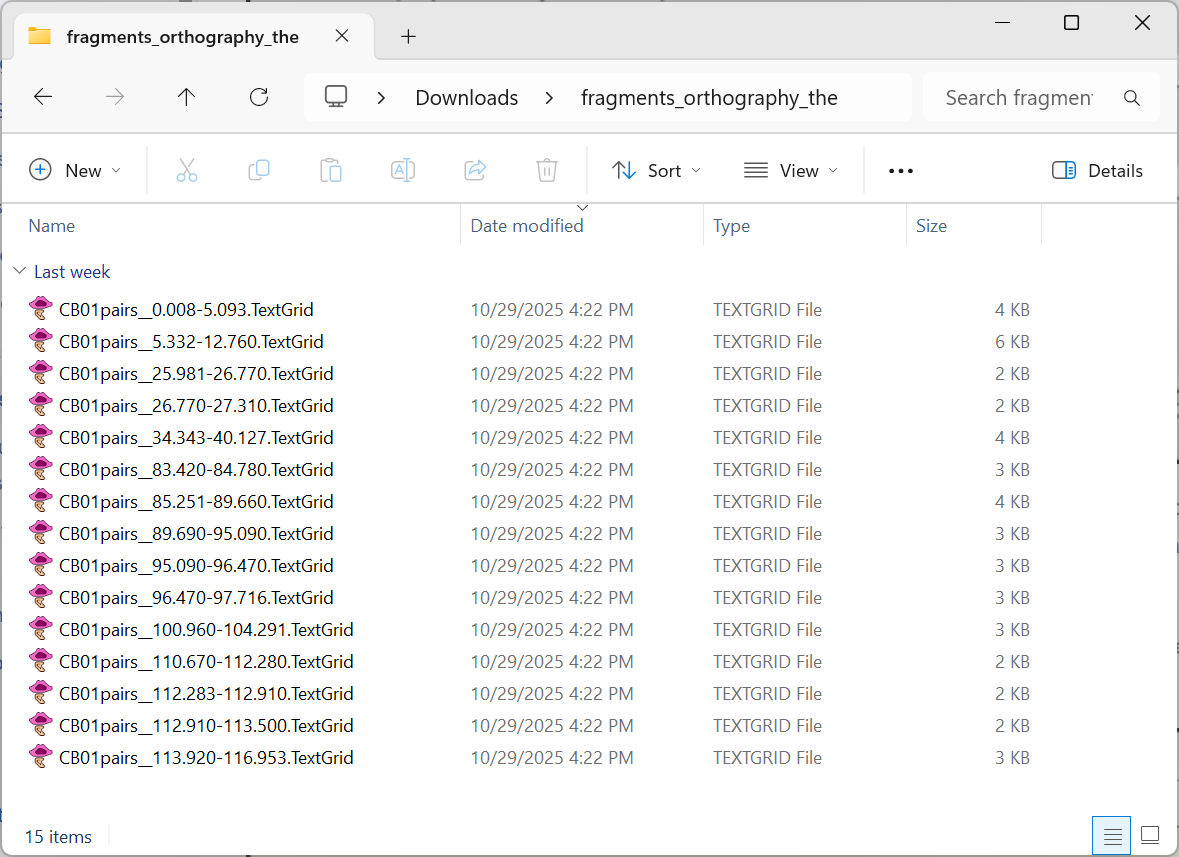
Here’s what the unzipped folder of TextGrids looks like:
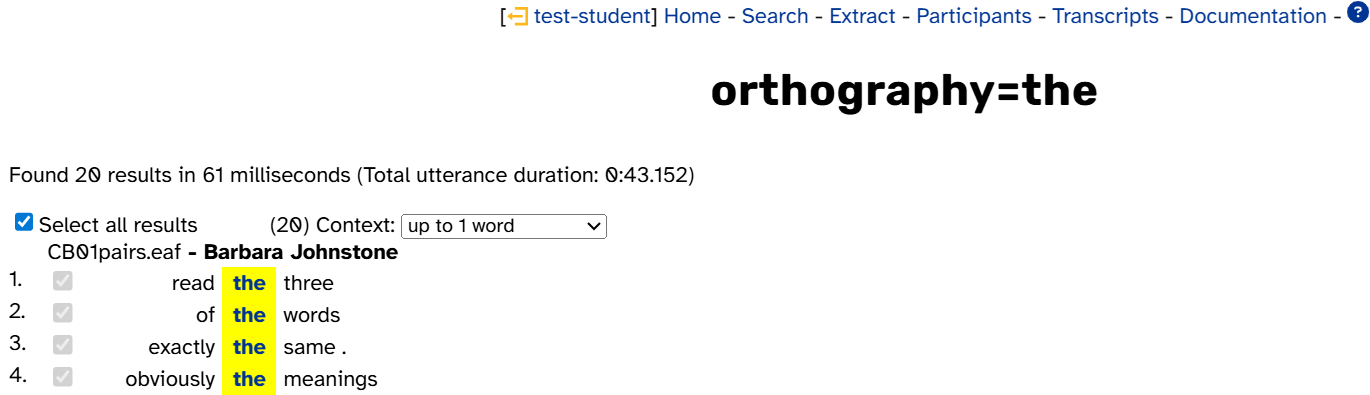
For this search, the search name is orthography=the:
Running CodeTokens.praat
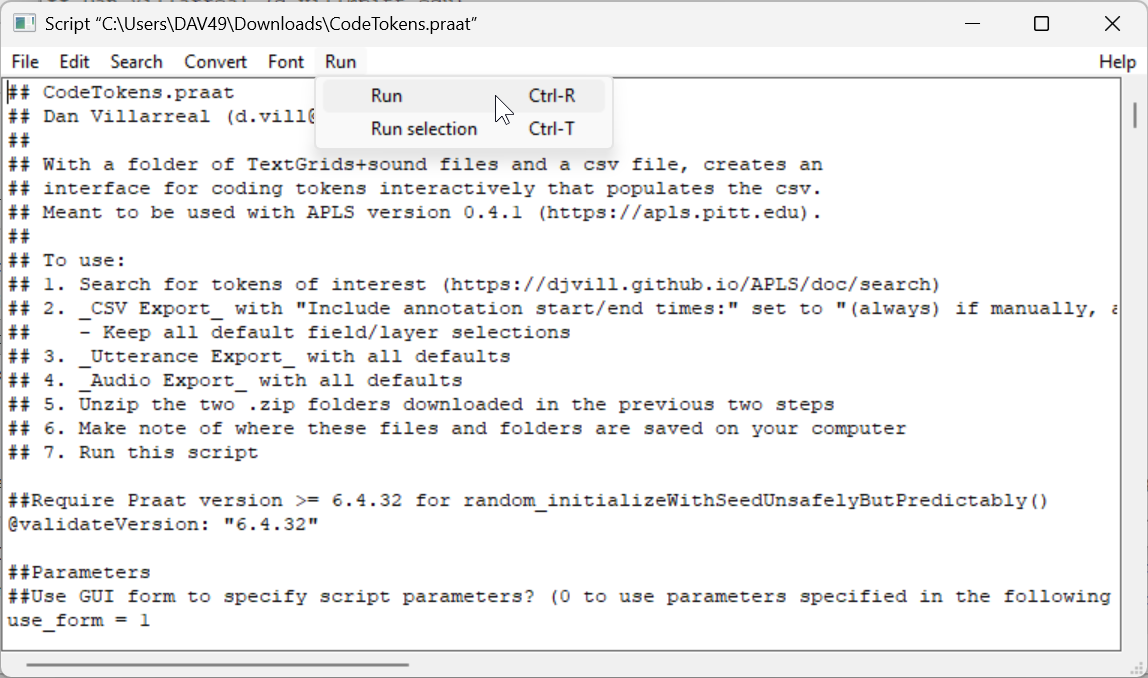
- Open
CodeTokens.praatin Praat. - Run the script by clicking the Run menu then Run
Initial settings
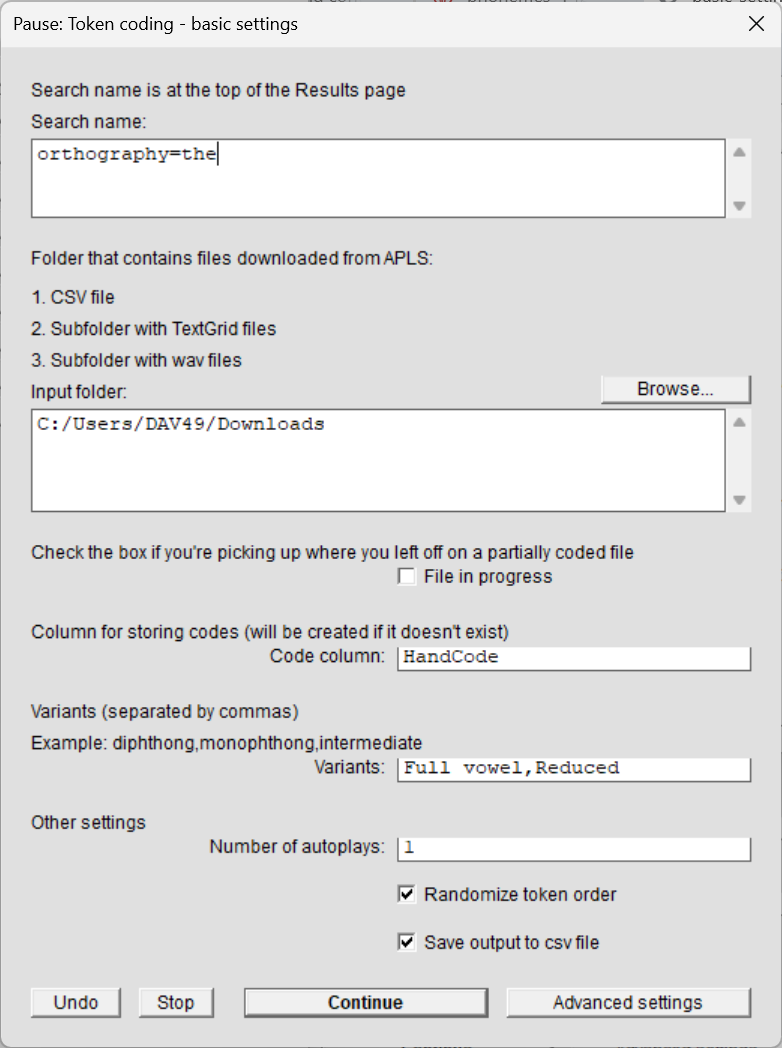
This will bring up the basic settings window. Most settings have defaults that should work for most cases (see below for information on other settings). At the very least, you’ll need to:
- Paste the search name in the box under
Search name:CodeTokens.praatuses this to find the files you downloaded from the Search results page.
- Specify the variants you want to code for in the box next to
Variants:- Use commas to separate variants, like
diphthong,monophthong,intermediateorFull vowel,Reduced CodeTokens.praatuses this to set up the variant options in the coding screen.
- Use commas to separate variants, like
Coding screen
Once you’ve specified settings, click Continue to start coding. CodeTokens.praat will open a coding screen and autoplay a token. Here’s what that looks like:
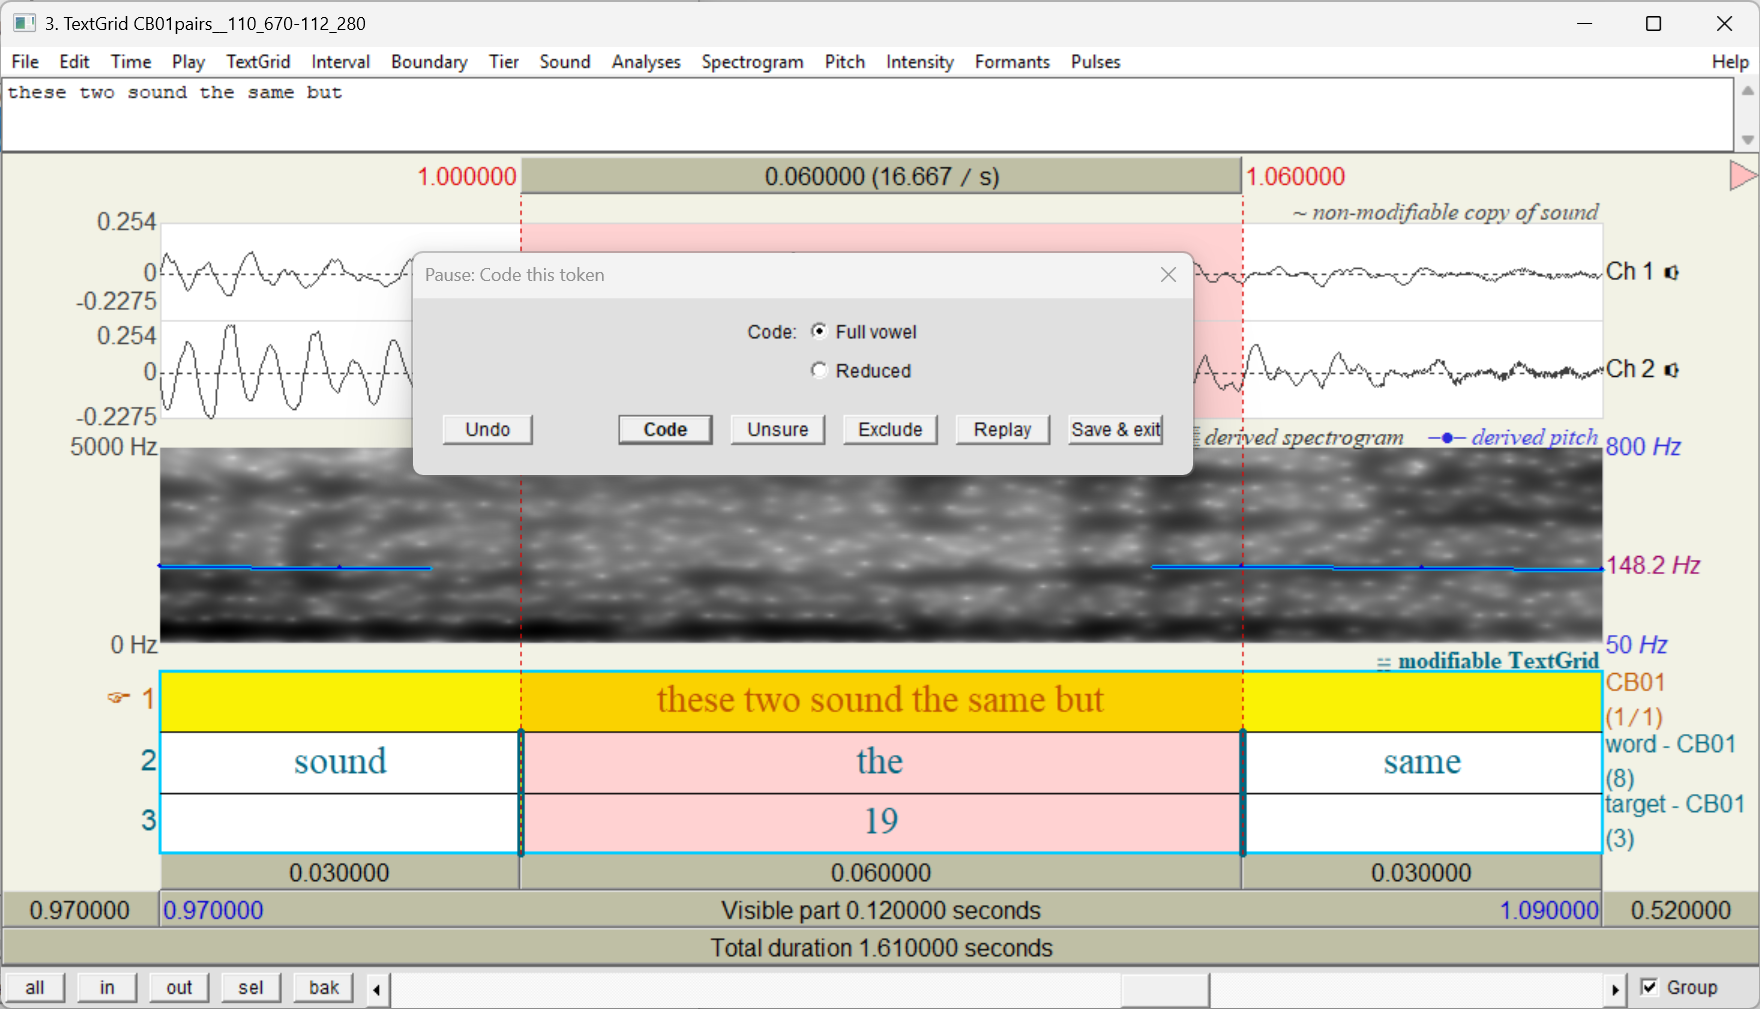
As you can see, the coding screen consists of two windows:
- A TextGrid window with the audio and time-aligned annotations for a single token
- In the previous image, this is the window with the title
3. TextGrid CB01pairs__110_670-112_280. - The audio and annotations include the token itself (highlighted in pink) and some context before and after.
- In the previous image, this is the window with the title
- A popup window with coding options
- In the previous image, this is the window with the title
Pause: Code this token
- In the previous image, this is the window with the title
To code the token, on the popup window, click the variant you hear, then click Code. When you click Code, the script will fill the code into the coding column at the row corresponding to this token, then it will open a coding screen for the next token.
Instead of clicking Code, you can also press
Enter(on a Windows keyboard) orReturn(on a Mac keyboard).
The Unsure and Exclude buttons fill special codes ((unsure) and (not a token)) into the coding column. Like the Code button, both of these buttons will open a coding screen for the next token. Here’s some situations where you might use them:
- Unsure
- You’re early in the coding process and your ear hasn’t been trained to the different variants.
- You can come back to
(unsure)tokens later by selecting the File in progress checkbox on the basic settings window.
- You can come back to
- You want the dataset you analyze to only include tokens that clearly belong to one variant or another.
- You’re early in the coding process and your ear hasn’t been trained to the different variants.
- Exclude
- A search result isn’t actually a token of the variable you’re interested in.
- For example, you might discover that a the is actually a mis-transcribed a or this, so the token shouldn’t be included in the analysis.
- You’re planning to extract acoustic measurements and the token is misaligned (that is, its start and/or end time is incorrect)
- If you’re not planning to extract acoustic measurements, we recommend coding the token as-is even if it’s misaligned
- If you make manual corrections to token alignments, please send them to us!
- A search result isn’t actually a token of the variable you’re interested in.
The Replay button replays the audio that’s visible in the TextGrid window. The Save & exit button stops the coding process and saves a file with whatever codes you’ve filled in.
Finally, in the TextGrid window, you can zoom out to hear more context, scroll earlier or later in the utterance, and view acoustic information. You can learn more about navigating the TextGrid window in section 7.1 of Will Styler’s Using Praat for linguistic research.
After coding is done
Once you’ve coded the last token (or clicked Save & exit), the script will save the filled-out coding file and display a window telling you where to find it:
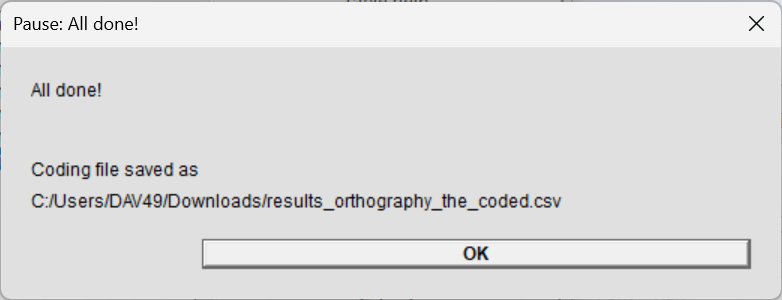
By default, the script saves the filled-out coding file with a
_codedsuffix in the input folder. You can choose a different location or name on the advanced settings window.
Here’s what that file looks like in Excel:
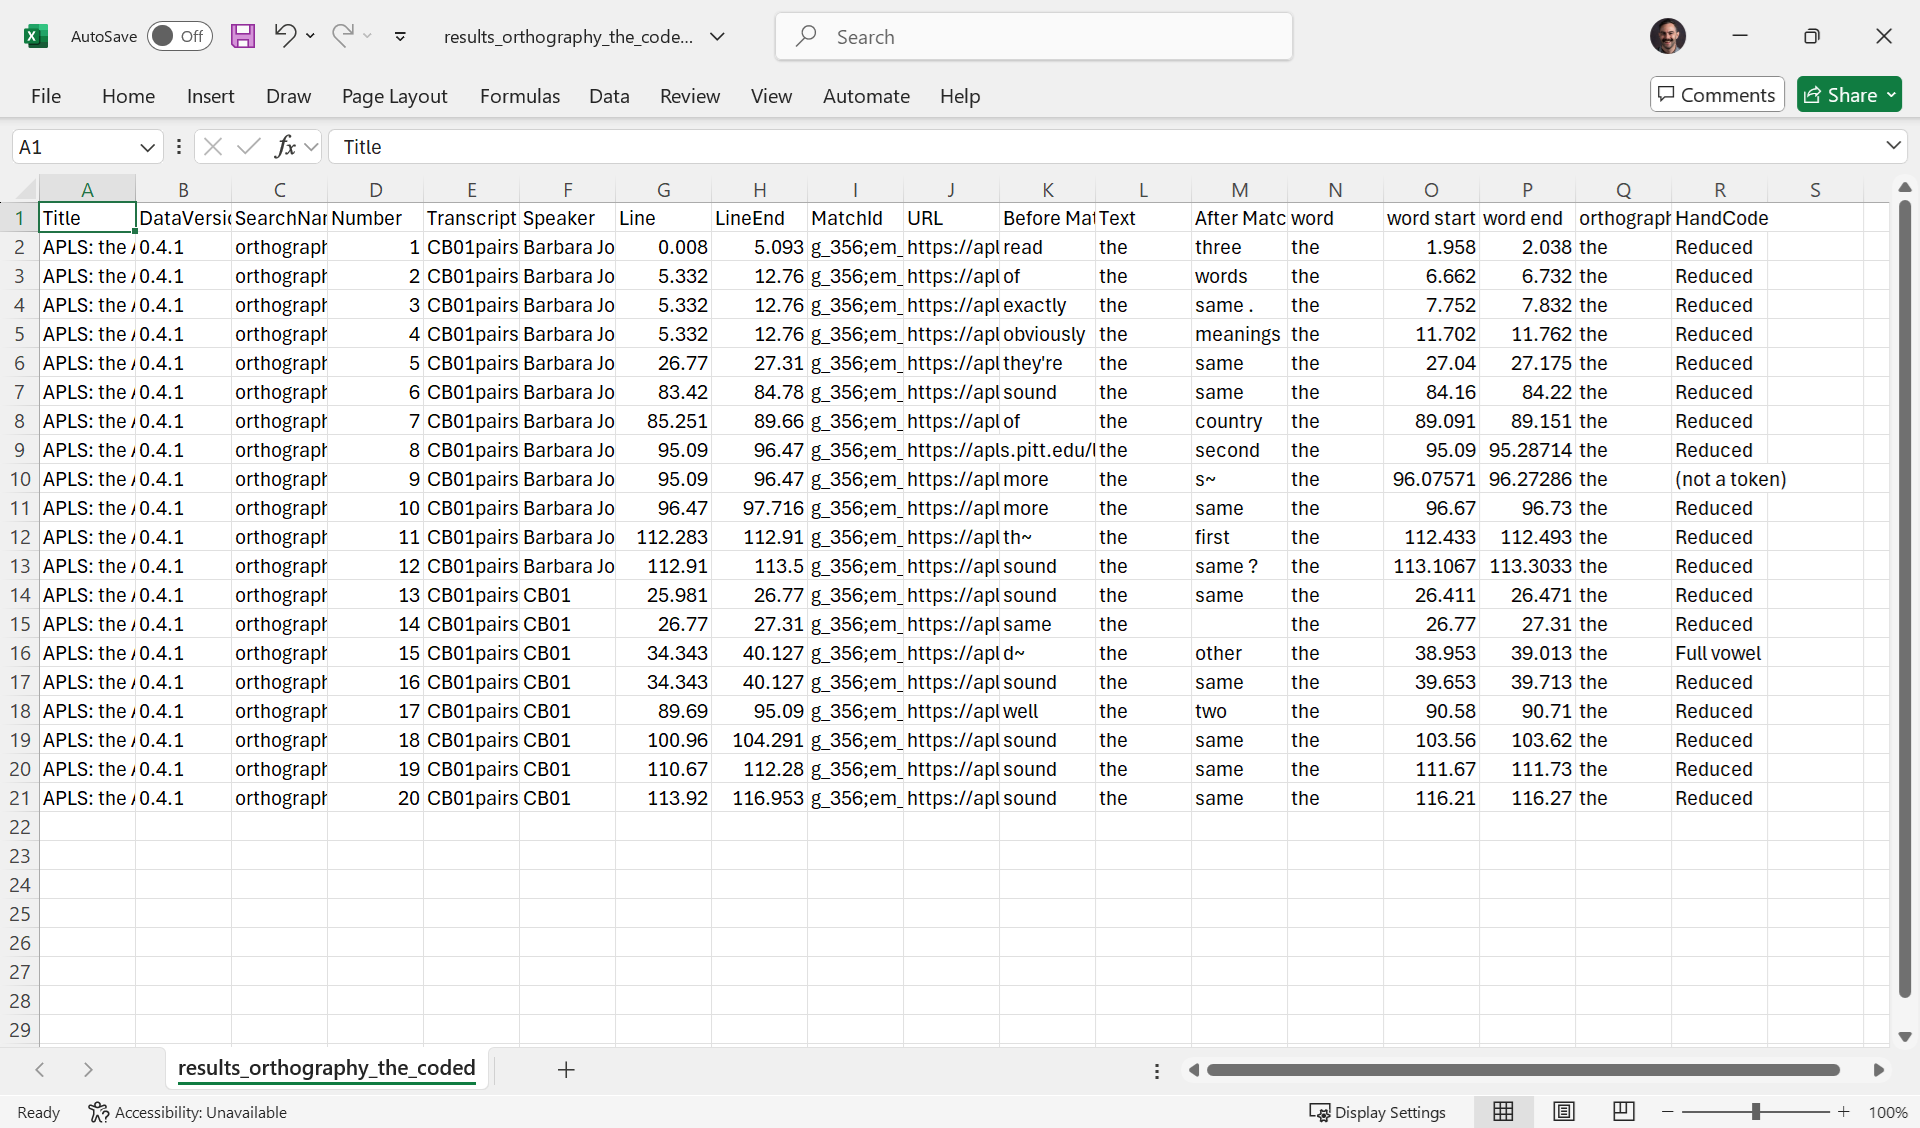
As you can see, the HandCode column has been filled in with codes.
Settings
The basic settings window appears when you run CodeTokens.praat. You can reach the advanced settings window by clicking Advanced settings on the basic settings window, then go back to the basic settings window by clicking Basic settings. Clicking Continue on either window will load the first token’s coding screen.
If you’re savvy with Praat scripting, you can save yourself time by hard-coding your preferred settings into
CodeTokens.praatand settinguse_form = 0toward the top of the script. To learn more about Praat scripting, check out section 12 of Using Praat for linguistic research.
Basic settings
Search name- The search name, which you can get from
- The title at the top of the Search results page, or
- The
SearchNamecolumn in the search results CSV you exported from APLS
CodeTokens.praatuses this to find the files you downloaded from APLS- Cannot be blank. If this is blank,
CodeTokens.praatwill display an error message and exit
- The search name, which you can get from
Input folder- The folder where you downloaded files from the APLS Search results page
- Defaults to your Downloads folder
- Click Browse… to open a new window that helps you select a folder on your computer
File in progress- You can use this option if you’re doing your coding in multiple sessions
- If
File in progressis selected,CodeTokens.praatwill look for an input CSV file that ends with a_codedsuffix - If
File in progressis selected,CodeTokens.praatwill present either:- tokens that have a blank in the coding column, if there are blanks
- tokens that have
(unsure)in the coding column, if there are no blanks and at least one(unsure)
Code column- The column for storing codes (including
(unsure)and(not a token)codes) - If you and a collaborator are coding the same tokens for quality-control purposes, you can specify different coding columns with your names (like
Codes - DanandCodes - Jack)
- The column for storing codes (including
Variants- Use this to specify the variants that you can choose from on the coding screen
- Use commas to separate variants, like
diphthong,monophthong,intermediateorFull vowel,Reduced
Number of autoplays- Use this to have
CodeTokens.praatautomatically play the token (and context) when the coding screen is loaded - Set this to 0 to disable autoplaying
- If you set this to 2 or more, you can set the buffer between autoplays on the advanced settings window
- Use this to have
Randomize token order- Use this to present tokens in random order, to avoid having your codes be overly influenced by hearing tokens from the same speaker or transcript all in a row
- If deselected, tokens will be presented in the order that they appear in the input CSV file
Save output to csv file- If selected, once you finish coding tokens or click Save & exit on the coding screen,
CodeTokens.praatwill save the filled-out coding file - You can set the output file location and name on the advanced settings window
- If deselected, the coding file will still remain in your Praat Objects window as a Table object. It will be deleted once you close Praat unless you manually save it by clicking Save > Save as comma-separated file…
- If selected, once you finish coding tokens or click Save & exit on the coding screen,
Advanced settings
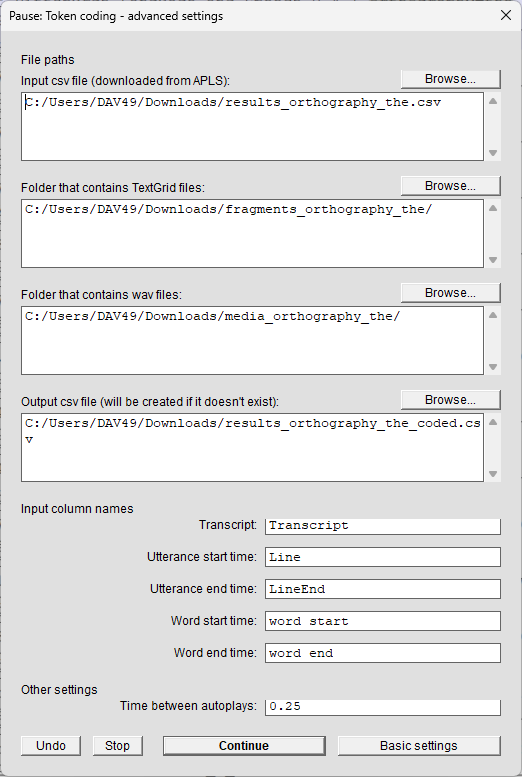
Input csv file (downloaded from APLS)- The path to the CSV file that you downloaded from CSV Export on the Search results page
- Defaults to the input folder +
results_+ the search name +.csv- If you selected
File in progresson the basic settings window, this defaults to the input folder +results_+ the search name +_coded.csv
- If you selected
- Click Browse… to open a new window that helps you select a file on your computer
Folder that contains TextGrid files- The unzipped folder that you downloaded from Utterance Export on the Search results page
- Defaults to the input folder +
fragments_+ the search name - Click Browse… to open a new window that helps you select a folder on your computer
Folder that contains wav files- The unzipped folder that you downloaded from Audio Export on the Search results page
- Defaults to the input folder +
media_+ the search name - Click Browse… to open a new window that helps you select a folder on your computer
Output csv file (will be created if it doesn't exist)- The path to a CSV file where
CodeTokens.praatwill save your filled-out coding file once you finish coding tokens or click Save & exit on the coding screen - If the file doesn’t exist,
CodeTokens.praatwill create it - Defaults to the input folder +
results_+ the search name +_coded.csv - Click Browse… to open a new window that helps you select a file on your computer
- This option is hidden if
Save output to csv fileis deselected on the basic settings window
- The path to a CSV file where
Input column names- Column names that
CodeTokens.praatwill look for in the input CSV file to find utterance/audio files and zoom in to the token when it loads each token’s coding screen
- Column names that
Time between autoplays- Time buffer (in seconds) between autoplays when
CodeTokens.praatloads the coding screen - This option is hidden if
Number of autoplaysis set to 0 or 1 on the basic settings window
- Time buffer (in seconds) between autoplays when